Tips for finish Caulking and Brush Painting

Do you have work to be done around the house and yet cannot get caulk to behave, and paint to stop dripping? Ever wondered how trim gets painted, and eaves look so nice on your friend's home? Well, I'll give tips to accomplish the same look in your house. I call it the "gingerbread house" look, and it's a seamless design that I've used inside and out on many homes.
Techniques for Finish Caulking
You should always start with caulking, and it doesn't have to be the expensive stuff to last. What matters is your painting coverage and good carpentry. With that done, even the cheap painter's caulk will last many years. As an example, I always use screws and metal brackets on the inside corners of eaves to keep them secure even with the heat of the sun. Any work like this will keep caulk from cracking and leaking.
Now, a few tips with caulking. Bear in mind here that there are many ways to do something, but these are the techniques that work with me. So, take what you will.
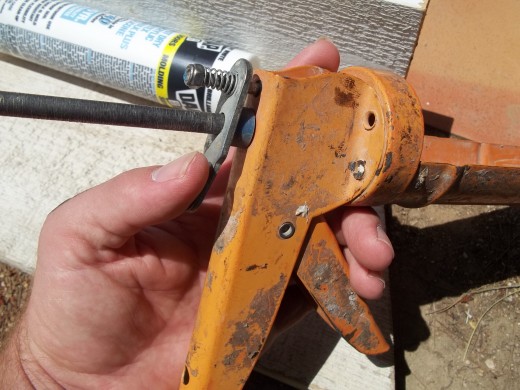
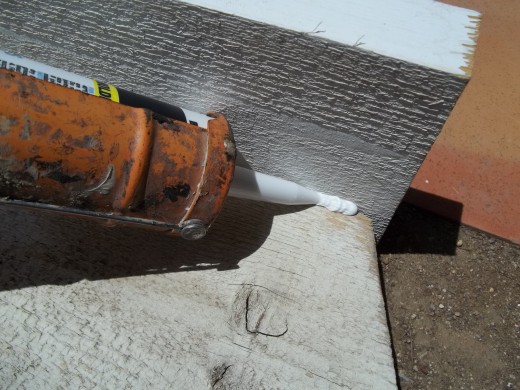
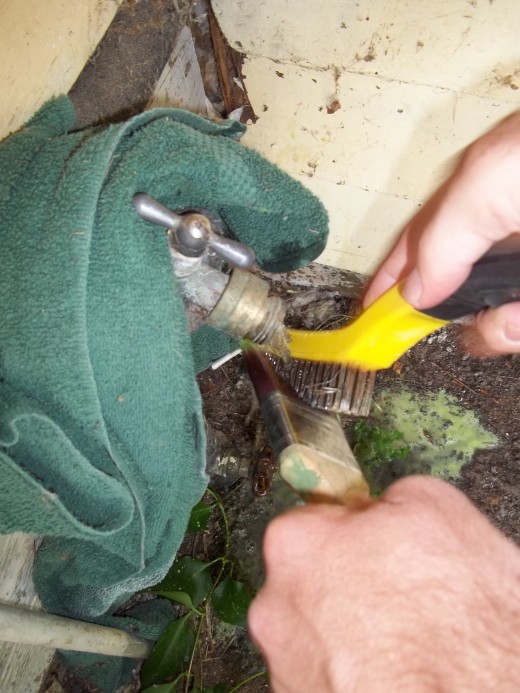
First, make sure you have a proper caulk gun. Most guns are going to keep pushing after you have stopped, so get used to tripping the relief tab after every application. However, make sure you buy a gun that does not flex too much under pressure. This will cause many problems, so get a caulk gun that is built securely. Also, bear in mind that some caulk tubes are badly packed. There may be air in the tube, which could cause it to keep going after you have stopped.
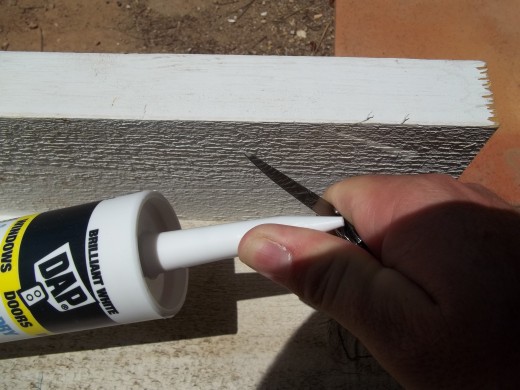
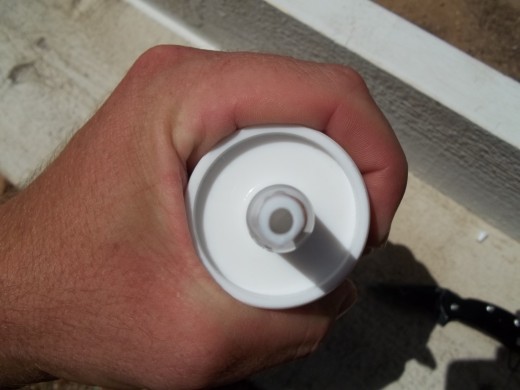
Second, in finish work, it matters how you cut the applicator tip on each tube. You want it just the right size to keep up with a fast application but not so big that you lose control of the flow. And, it should also be angled to help directing the flow into the area you are sealing. Generally, I cut the applicator tip about a 1/4 inch from the end at about 30 to 40%, and I use a sharp pocketknife.
Third. Transparent caulk shrinks much more then plain white, so always use white caulk if you plan to paint and want to save time without repeated applications. Most jobs have to be painted, so rarely do I ever use transparent caulk.
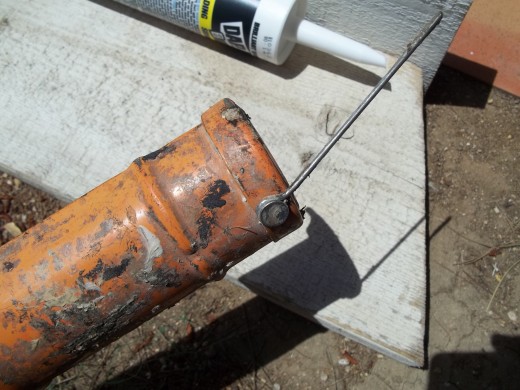
Four. Some tubes have a manufacturer's seal inside and some don't, so get used to checking inside the tube before you load it in the gun and force it. If the caulk gun is ready, everything will be easy. You should never have to force anything. If the tube is badly packed and clogged, you should be able to use a dry-wall screw to pull any blockage out. Otherwise, use the wire on the underside of your caulk gun to clear some blockages, and the manufacturer's seal.
Five. Always have a wet wash-rag handy to keep your fingers wet during application. This is the secret to having a finish look because caulk does not stick to you during the application. Not only does this help remove the mess but it also gives a smooth look to the finished product.
Six. Having a putty knife or scraper available is nice too for small holes or larger cracks. Just keep the putty knife wet, and use it as if you were spreading plaster after you have filled the hole. Start with one heavy stroke to compact the fill, and a second or third quick, light stroke to finish it. Also, don't mess with the fill too much with your fingers. It is very easy to overwork caulking and make things worse especially with filling situations. Just wait and cut off the excess if needed after the job has dried, before painting.
Seven. Be minimalist yet fast with your application. Also, keep the tube loaded and turned with the angled tip towards the work. The trick with any application is making sure the caulk sticks to the surface of your work. As long as it sticks, you can apply as fast as you can. It takes experience to do this, so start somewhere you can clean up easy, and then squeeze hard on the trigger and draw the gun across the surface as fast as it takes to keep up with the slack. Only practice will teach you exactly how to do this.
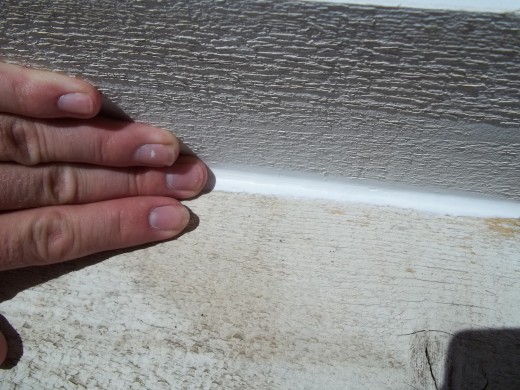
Eight. After you have applied a section of caulk to the work, wet the fingers of the hand you will use to smooth it with a wash-rag soaked and squeezed lightly to prevent water from getting everywhere. Then, compress and draw one finger over the caulk-line with a steady, even pressure, keeping your angle close to the surface. A perfect minimalist caulk-line will solve issues with excess. NEVER USE THE SAME FINGER EVERY TIME, and be careful of splinters.
Nine. Only apply as much caulk per application that the environment allows you. An extreme case is a warm day and under direct sunlight, which may allow only a few feet to be done at a time. If the caulk-line clogs during smoothing, then you have applied too much.
Techniques for Finish Brush Painting
Very good! Now that your job is sealed, now is the time to paint!
Seeing as this is about finish painting, I'll assume you already know general things about painting, and have primed what you need to prime.
Good, now lets skip right to the good stuff.
The first step is recognizing when you need to trim with a brush, and when you don't. When painting a house, always start with the main color first and over-spray (if using a sprayer, of course) onto your door and window trim-boards, and afterward roll your trim paint over that, never minding the outside edges. This way, as long as you are careful with excess paint, your trim-boards will doing the cutting for you, for the most part. The inside edges will still need to be cut with a brush, so use masking tape over windows and such (if you just sprayed the house, the windows should already be taped and covered). Also, always remove hardware. This does save time in the long run, believe me.
Now that you are sure where you have to brush, this is how you do it.
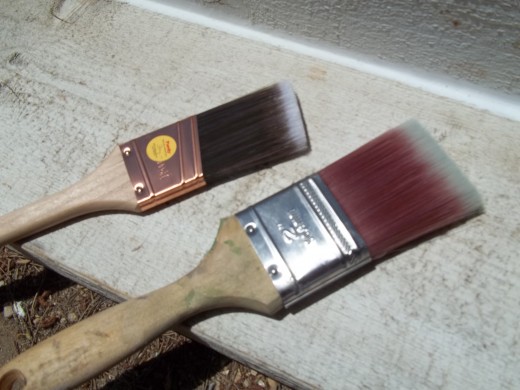
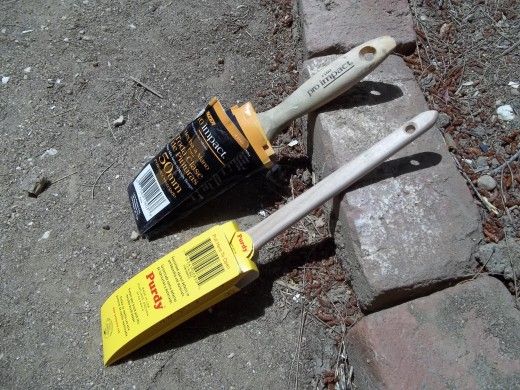
I like to use a square, flat brush for everything, but some people like to use angled brushes. It truly does not matter. Just as long as you, the reader, are comfortable with your tools and technique, and can do it quickly. Please use trial and error when trying these techniques though, because many were developed by me while using a square brush.
One. Use a good brush with fine bristles. I don't really have a preference brand-wise as long as the bristles are fine, and move easily.
Two. Plan out your job so you never have to cut a line more then you have to. If two colors ever have to meet on the same surface, paint your main color past where you want it, mark your cutting line over that, and then cut the last color just over that line. This way you only have to cut a line once.
Three. When ready to brush, dip it first 1/3rd up the bristles and wipe off both sides before starting. This allows for uniform flow right away.
Four. Dip the brush 1/3rd into the paint and wipe off one side and the end, then immediately start laying out the paint, un-wiped side down. Don't worry about spreading the paint evenly right away, just lay the paint down and then run the brush over several applications at once to smooth it.
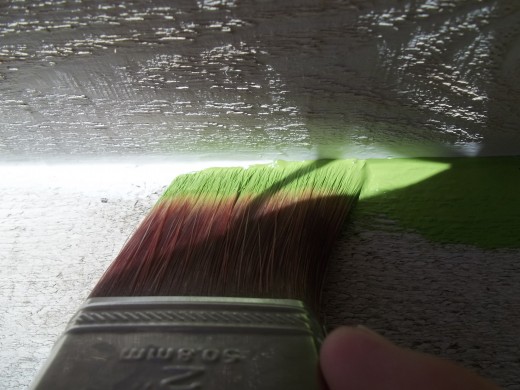
Five. When ready to cut the finished line, lay the un-wiped side of the brush onto the surface inside of the painting area, then wiggle slightly and draw side-ways up to the line, maintaining a small bead just before the cut line. Keeping the bead small will reduce dripping, and also lessens the chance of wicking when you get close to another surface. To make the bead smaller, either abort and draw away from the line before lifting away, or spread faster.
Six. Dropping one finger to the work surface while cutting will help you steady your hand.
Seven. When needed, wiggling your brush hand will help the paint move inside the brush, and it will help lay a clean strip of paint especially over an uneven work-surface.
Eight. If cutting into a corner, either use masking-tape and allow the paint to wick onto it, or maintain a wick bead that covers a little ways onto the opposing surface and keep it the same depth. As long as the line is even, it will not be noticed. Be careful to keep the bead small. Otherwise, it will drip before it has dried. I prefer to wick past the corner without the tape, because often the tape will pull paint in underneath and leave a mess that you will only see after it has dried.
Nine. To cut a gradual curve, simple twist the brush with downward pressure and let the bristles re-adjust your bead to fit the curve. Just move steadily until you get used to what will happen while twisting.
Ten. Clean the paintbrush with a wire brush using swift, deep, strokes. Do this under running water if the paint was acrylic and "toss" the remaining water onto the ground. If cleaning from an oil-based paint, massage the brush using paint-thinner and dry using a clean cloth.
Eleven. After making sure your paintbrush is dry, make sure all bristles are straight and store either in the original wrapper, or a cloth.


